|
Contents Home NeoLemmix NeoLemmix Level Packs Official Lemmings Games NeoLemmix Editor Flexi Toolkit Format Information Lemmings Plus Lemmings Plus I Lemmings Plus II Lemmings Plus III Lemmings Plus IV Lemmings Plus V Lemmings Plus Omega Holiday Lemmings Plus Lemmings Plus Flashbacks Lemmings Plus Flashbacks II LP Packs Comparison My Other Levels Doomsday Lemmings NeoLemmix Introduction Pack Lemmix (Traditional) CustLemmix Flexi Lemmix Lemmix Players Tools Tools List NeoLemmix Graphic Set Tool Obsolete LemMain LemSet NeoLemEdit |
Flexi Lemmix Tutorial - Part 2
Welcome to the Intermediate section of the Flexi Lemmix tutorial! You've already learnt the basics of putting together a custom pack in the Beginner Tutorial. This part will teach you more about implementing custom content, other than just levels, into your Flexi-based NeoLemmix level pack. 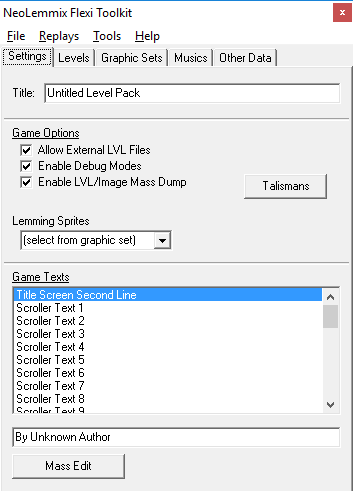 You already know most of how to work the Settings tab from the basic tutorial. The one thing left to cover is the Talismans tab. You may have seen in some NeoLemmix packs, there are talisman challenges, that are essentially like achievements. If you have used the Talisman Tool in the past, this will be very familiar to you, as the Talisman Editor in Flexi Toolkit is almost identical to the old Talisman Tool. 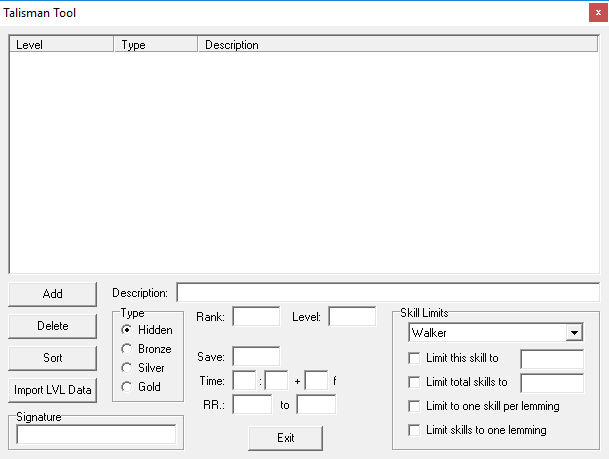 To add a talisman, the first thing to do is click "Add". You can then select a Talisman type; "Hidden" is not really useful these days, but you can choose between Bronze, Silver or Gold depending on how hard you think the challenge is. "Delete" and "Sort" should be self-explanatory. (Note that "Sort" is provided for editing convenience only; NeoLemmix always automatically sorts them in-game.) First, you should enter the rank and level number. For example, if you were editing Original Lemmings and wanted to put a talisman for Tricky 9, you'd enter the rank as 2 and the level as 9. After doing this, you should click "Import LVL Data"; this will set all challenge requirements to the stats of the level itself. This is because otherwise, these may not nessecerially need to be achieved - for example, if a level requires you to save 40 lemmings, but the talisman requirement is only 1 lemming, the talisman will be awarded for saving one lemming (if all other conditions are met), even if this doesn't pass the level. Description is the text that will appear in the in-game talisman menu. You should describe the requirements to achieve the talisman here; be aware that NeoLemmix does not auto-generate details of the requirements, it's up to you to provide them. The Save is used to set how many lemmings must be saved to unlock the talisman. The time is used to set the maximum time the player may take in order to unlock the talisman (note that this is measured when the last required lemming exits, not when the user ends gameplay). This can be set as precisely as individual frames - the first input box sets the minutes, the second one sets the seconds, and the third sets the leftover frames (one second = 17 frames). The RR is used to set what range of release rates the user must stay within in order to achieve the talisman. Note that this is only checked when a lemming spawns, and stops being checked once the last required lemming exits or the last lemming spawns (whichever comes first). The skill limits dropdown box can be used to select skills, after which you can set a limit on how many times the player may use that skill in order to achieve the talisman. You can also set a total limit of skills; this will mean that the talisman wil only be achieved if the player uses no more than that many skills, but it does not matter which skills they use. The "Limit to one skill per lemming" means that in order to achieve the talisman, each lemming can only be assigned a maximum of one skill. If the player ever assigns two skills to the same lemming, the talisman will not be achieved. The "Limit skills to one lemming" is the inverse of this. It means that you can assign as many skills as you want to one lemming, but if the player assigns even one skill to a second lemming, the talisman will not be achieved. A single talisman challenge can mix and match as many of these requirements as desired. For example, you could have a talisman which requires you to save 60 lemmings in under 3 minutes, while using no more than 5 builders and no more than 10 skills total, while never assigning more than one skill to the same lemming. The last thing is the "Signature". You don't need to worry about this; this is just a unique ID for the talisman so that even if new talismans are added or reordered, NeoLemmix will remember which ones have been unlocked rather than re-locking some and unlocking others because they're in different positions. These will be automatically generated, but if for some reason you want to manually modify them, you can. One thing to keep in mind - if you reorder the levels in your pack, the talisman rank / level will automatically adjust to reflect this. However, the description will not; you will need to update this manually if you've mentioned the level's position in there (which you should, so that people know what level it applies to, although you could reference them by name if you prefer - it's up to you). The levels panel is next. You may think we covered everything before, but there is in fact one detail that we didn't cover. 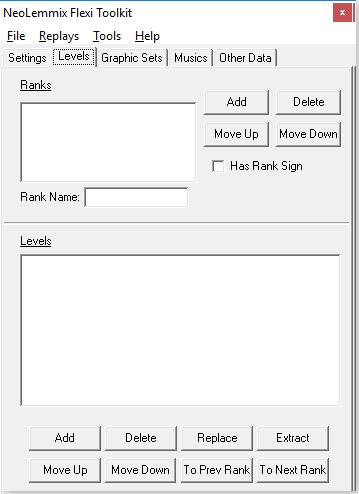 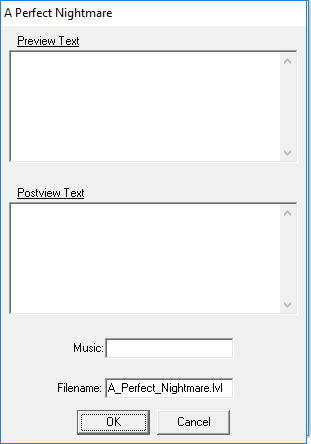 You probably know how some levels have text screens that appear before or after them. By double-clicking on a level in the list, you can assign these texts to it. Each text may be up to 18 lines long, and each line may be up to 40 characters long, including spaces. If you ever want to remove one from a level, just completely blank it out. The "Music" here is no different from editing it in the level file itself (in fact, that's exactly what it does), and is mostly included here for convenience. You may specify a music track here, which will override the normal rotation (think of how Fun 22, Tricky 14, Taxing 15 and Mayhem 22 acted in Original Lemmings). If you leave it blank, the level will use the normal rotation. The filename is for when saving the level in the project folder; it has no bearing on the generated pack. You can use it to keep your levels folder organised. In regards to the "Rank Sign" checkbox, this indicates whether or not a custom graphic to display on the rank sign (think the sign that said "Fun", "Tricky", "Taxing" or "Mayhem" on the main menu in Original Lemmings) has been added to the pack. If there isn't one, you can add one by clicking here. In regards to how to use the menu when adding one, please look at the Other tab below; this here is essentially just a shortcut. Next up, the Graphic Sets panel. 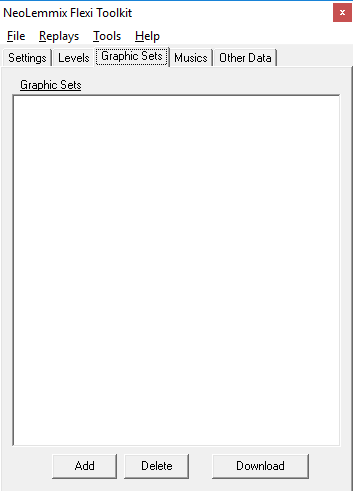 We already know that if we're using standard graphic sets, we don't have to include them. But what if we want to use custom ones - perhaps the ones from the addon packs, or ones converted from Cheapo, or maybe we've even made one of our own? Well, we can do so here! This is quite simple - click "Add", select the file, and it will be added. If we want to remove a graphic set or special graphic file from our pack, we simply select it and click "Delete". You can also download any graphic set that's on the list of those that NeoLemmix can auto-download, via the Download button. 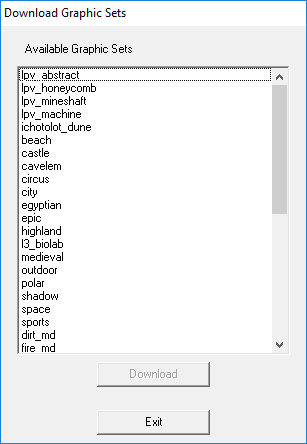 Using this menu is as simple as selecting the graphic set you want, then clicking "Download". It may take a few seconds to actually load this menu; and it goes without saying that an active internet connection is required. Creating graphic sets is beyond the scope of the Flexi tutorial; use the NeoLemmix Graphic Set Tool to create them. The graphic set tool can also be used to convert the older-format graphic sets to the current format. Next stop, the Musics tab. 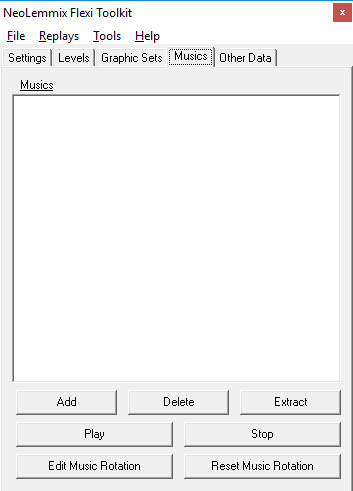 Like with graphic sets, you may want to add your own custom musics. There are a few supported formats, including OGG, WAV, MP3, IT, MOD and XM (this is not a comprehensive list). Note that MIDI is not one of the supported formats, and it is not likely to be any time soon. Like with graphic sets, you can use the "Add" button here to add them. When adding, you can select multiple tracks at a time. NeoLemmix supports looping OGG files with the "LOOPSTART" and "LOOPLENGTH" metadata info, but you will need to look elsewhere for help on how to add (and correctly set) these tags. Module-based formats can also loop; but special loop timing is not supported for sample-based formats other than OGG - all others will simply loop back to the start once they reach the end. Do not include lots of high-size, high-quality tracks in the internal music list. Although nothing prevents you from doing so, it becomes very annoying if users must download a huge file every time you update your pack. If you want large music files, you should provide them in a seperate ZIP file. Users can then download this and extract it to their NeoLemmix "music" subfolder. And finally, on to the Other tab. 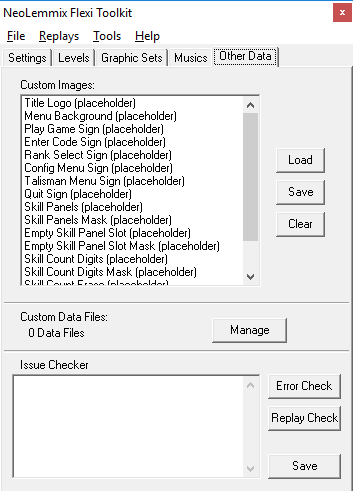 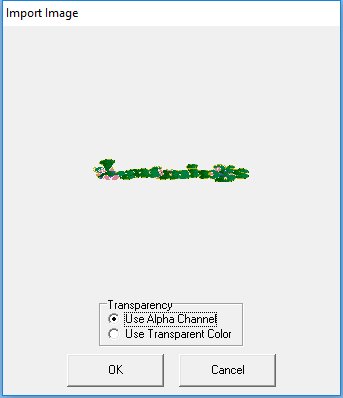 This tab allows you to import and export custom graphics and other data files. The Custom Images allows you to customize a lot of the game's images. To add a custom image for any graphic, select it in the list, click "Load", and choose an image file. PNG, BMP or GIF images can be used. After loading an image, you will get a popup window asking whether to use the alpha channel for transparency, or a transparent color. If you wish to use the alpha channel (the default setting), you are done - simply click OK and your image has been imported. If however, you haven't (or cannot) use an alpha channel, you may select the "Transparent Color" setting. After picking this, you can click on any part of the image, and all pixels of that color will be treated as transparent. In the case of larger images which may be unclear, you can resize this dialog by clicking and dragging near one of the edges. One thing that may not be obvious is the "Mask" images that are supported with some images. These are used to obtain the effect of using a color determined by the graphic set. These images will be recolored based off the graphic set's primary color, then overlaid on top of the image. A completely white pixel will give the graphic set's primary color exactly, while decreasing intensity of the RGB values will correspondingly decrease the intensity of the color applied by the mask. You do not have to include a mask for every image, even if you're including a custom image of that kind. By using non-grayscale pixels in the mask, and semitransparency (which is supported in all masks, including those of images that don't themself support semitransparency), the masking can be very powerful. It is completely acceptable to include some custom images but not others. Custom lemming sprites, as well as some other custom graphics, cannot be imported here and must instead be included as Custom Data Files. 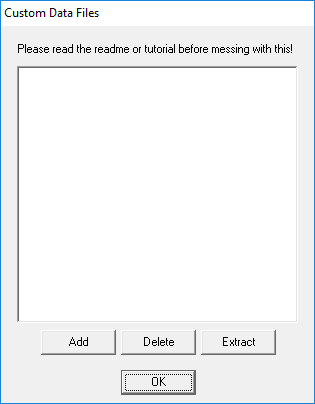 Custom data files can be used to build any file you want into your NXP. Of course, if you include some random file with a random name, NeoLemmix will never actually make use of it. The purpose is primarily for custom images that can't be embedded directly via the above option, such as custom lemming sprites. We will not cover how to actually make custom lemming sprites in the intermediate tutorial, but if you already have some, you can use this menu to add the files for them. It is probably easiest to make custom images by starting from the defaults and modifying them; in particular, the size should not be changed. You can get the default system images here, and the default lemming sprites here. If you attempt to import a PNG or BMP file, you will be asked if you want to use the Import Image dialog (the same one offered when importing standard custom images above) to configure transparency. If imported via this dialog, they will also be converted to 32-bit PNG files. Premade images downloaded from the NeoLemmix Website already have proper transparency and are in the correct format, so do not need to be run through this dialog (if you do bring up this dialog, you should select the "Use Alpha Channel" option for these). What about Replay Check? Well, Flexi Toolkit has a replay manager which can be used to maintain a collection of replays for your level pack. Replay Check simply provides some quick statistics on the replays you've included. One other very neat feature of Flexi Toolkit is the Replay Manager. You can access this via the Replays -> Replay Manager option on the menu bar. 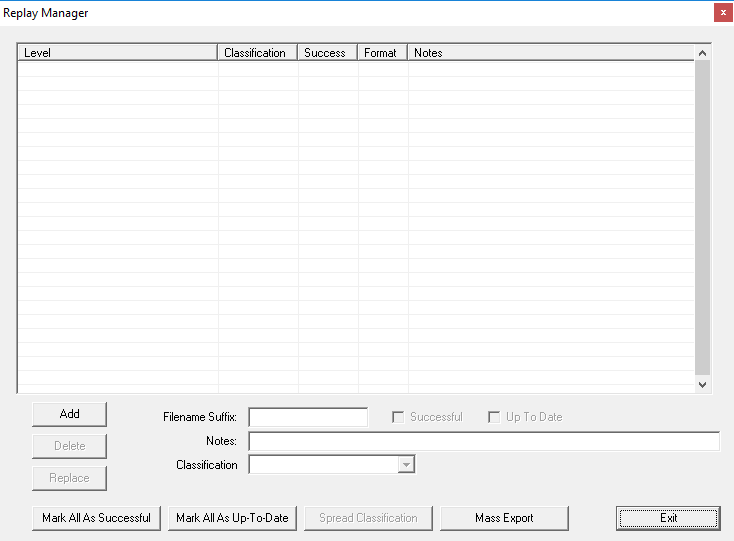 You can add a replay here by clicking the "Add" button. "Delete" and "Replace" should likewise be self-explanatory. Flexi will automatically link the replay file to the correct level (you do need to add the level first; it won't work if you add the replay first then try to add the level afterwards). When a replay is added, it is marked as "Unclassified" classification, not successful, and yes up-to-date. You can manually modify these properties yourself, or use the buttons to quickly change these properties on all levels. Do note that Flexi does not have the capability to automatically detect whether replays are successful or not. It can however detect if they may be out of date, although this is simply based on "has the level file changed at all?". The "Spread Classification" button may not be immediately obvious. Its function is, when clicked, all replays that have the "Unclassified" classification will be changed to the classification of the currently-selected replay. The available classifications are "Unclassified", "Intended", "Acceptable", "Attempt", "Backroute" and "Talisman". The advanced tutorial will cover how to add your own classifications. Filename suffix is used when internally saving the copy of the replay. It doesn't affect the exported replays in any way, and is mostly for organisation purposes. "Notes" allows you to add a message with a replay file, which will show up in the list. Finally, Mass Export is used to export all replays - or just those of certain classifications - in one go. 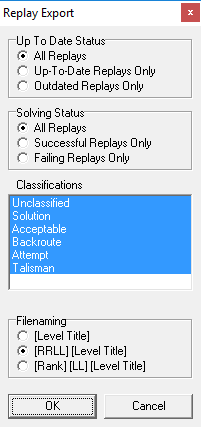 When you select Mass Export, this dialog will pop up to ask you which replays you want to export, and how to name the files. You can select more than one classification by holding Ctrl while clicking them. When you click OK, a select file dialog box will come up; the filename you enter doesn't matter, but the folder you select will be the destination for the exported replay files. Note that while using NXRP replays is highly recommended, the replay manager does support the older LRB format. Now that you know all these, you can customize virtually every customizable aspect of your level pack! So, what's left for the advanced tutorial then? Well, sometimes you might want to modify something without having to go through the tool, and that's what will be covered there - how to manually manipulate the data files. It will also cover custom lemming spritesets. So if you feel like you'd like to know how to manipulate the files directly, see the Advanced Tutorial. However, generally, the knowledge from these first two tutorials should be enough for the majority of users. |