|
Contents Home NeoLemmix NeoLemmix Level Packs Official Lemmings Games NeoLemmix Editor Flexi Toolkit Format Information Lemmings Plus Lemmings Plus I Lemmings Plus II Lemmings Plus III Lemmings Plus IV Lemmings Plus V Lemmings Plus Omega Holiday Lemmings Plus Lemmings Plus Flashbacks Lemmings Plus Flashbacks II LP Packs Comparison My Other Levels Doomsday Lemmings NeoLemmix Introduction Pack Lemmix (Traditional) CustLemmix Flexi Lemmix Lemmix Players Tools Tools List NeoLemmix Graphic Set Tool Obsolete LemMain LemSet NeoLemEdit |
Flexi Toolkit Tutorial
This guide will teach you how to put together a custom NeoLemmix pack using the Flexi Toolkit, and create an NXP file to distribute your game. This is for NeoLemmix, and the associated Flexi Toolkit app. If you're looking for information on the old toolkit (for traditional Lemmix), the tutorial for it is still available here. The NeoLemmix Flexi Toolkit is, as the name suggests, only available for NeoLemmix. It allows you to package your levels together and distribute them as a compiled game, with a presentation much like that of the official DOS Lemmings games - but with full access to NeoLemmix features. This tutorial will be divided into three parts. The first of these, the basic tutorial, will simply teach you how to set up a project folder, add levels to this project, and build an NXP file that can be played using NeoLemmix. The second of these, the intermediate tutorial, will also teach you how to add (and for some types, create) custom data files other than levels. The final one, the advanced tutorial, will teach you remaining tricks for the Flexi Manager. So, let's get started on building your custom pack. The first thing you're going to want to do is create a new folder to keep the tool's output in. At this stage, do not attempt to manually add, remove or modify any files in this folder, unless specifically directed by this tutorial. Of course there are situations where modifying them can be done, but that will be discussed in the advanced tutorial. Aside from that, you're also going to need some NeoLemmix levels for your pack. This tutorial will not attempt to teach you how to make levels, it assumes you already know this. If you are familiar with creating Lemmings levels in general, but not specifically NeoLemmix levels, please grab the NeoLemmix Editor (which is very similar to the traditional Lemmix level editor), and for help on NeoLemmix features, refer to this topic on the Lemmings Forums. The beginner tutorial will not cover use of custom graphics or music, so for now, simply use the default ones. The intermediate tutorial will cover how to use custom ones. So, let's put together our project! Open up the Flexi Tool, and you'll see the following window: 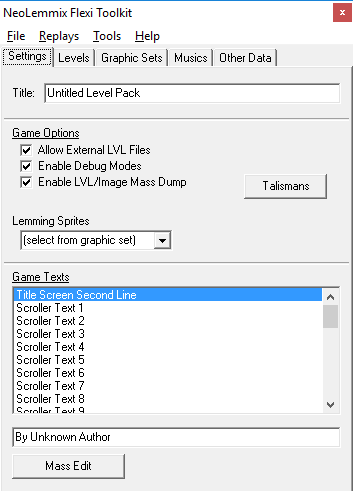 This window allows you to configure the core options of your level pack. The "Title" should be self-explanatory. The game options here function as follows:
The "Game Texts" option at the bottom allows you to set various texts in the game. The "Title Screen Second Line" is the line that appears near the bottom of the title screen (just above the scroller). The rest should be self-explanatory. The maximum length for each text here is 36 characters, except for Title Screen Second Line, which has a limit of 32 characters. The scroller texts can be left blank, in which case any blank ones will be skipped; all others must be filled out. However, the tool will automatically fill them out with default values, so you do not have to manually come up with texts yourself. The "Mass Edit" brings up a second window, allowing you to quickly edit all the texts at once. Do note that the Mass Edit dialog does not enforce length limits, nor does it prevent adding extra lines at the end. For this reason, it is recommended you copy and paste between that and a text editor (such as Notepad++) that allows easily checking the length. Note that the Karoshi texts are no longer actually used in recent versions of NeoLemmix, so you don't need to worry about these. 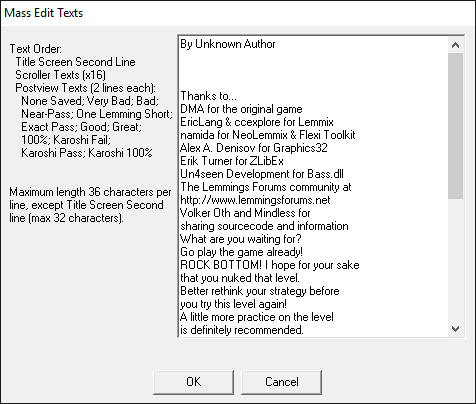 Our next panel is the "Levels" panel. 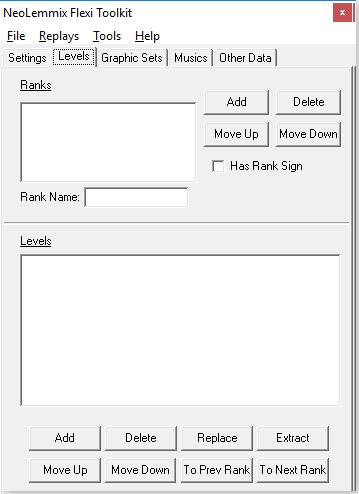 In this panel, you can configure the names, order and secret level counts of the game's ranks, as well as the levels in them. First thing you'll want to do is, of course, add a rank. To do this, click the "Add" button next to the ranks box. It will create a new rank, which you can then set a name for. You can repeat this as many times as needed to add multiple ranks; the limit is 15 ranks in a single project. Don't worry about the "Has Rank Sign" checkbox for now. We'll cover it in the Intermediate tutorial. Once you've created your ranks, it's time to add levels to them. To add levels to a rank, first, choose the rank in the Ranks box. Then, click the "Add" underneath the levels box. An open file window will pop up. Note that this window supports selecting multiple files at once - you can use the usual Windows shortcuts of Ctrl+Click and Shift+Click to select multiple files. The remaining options on this page are mostly self-explanatory. Next up, the Graphic Sets panel. 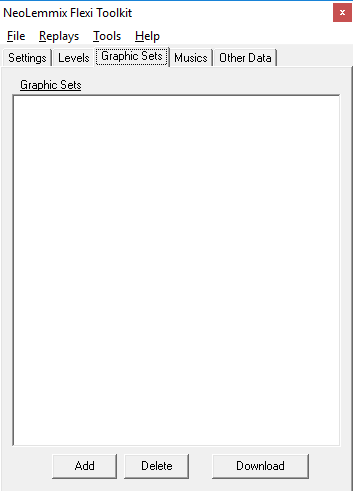 The "Graphics Sets" lists standard graphic sets, while "Special Graphics" lists VGASPEC files. In the beginner tutorial, we will not cover use of custom graphic sets. Since you do not need to include copies of standard graphic sets, you do not need to worry about this panel at this time. For the record, the "standard" graphic sets are considered to be all those from: - Original Lemmings - Oh No! More Lemmings! - Lemmings 2: The Tribes - Lemmings 3: The Chronicles / All New World Of Lemmings - Lemmings Plus II, III, IV and V - The "Xmas", "Sega", "Horror" and "Special" sets Next stop, the Musics tab. 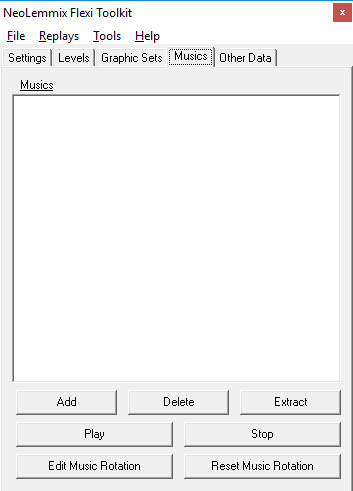 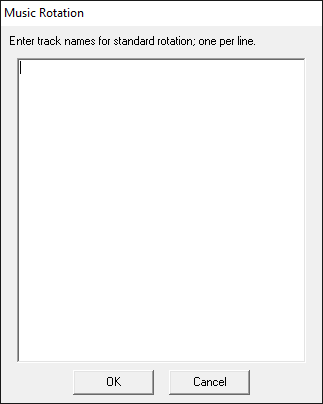 This tab lists (and allows you to modify) the music files included in your pack. Like with the graphic sets tutorial, we are not going to cover using custom musics for now. You do not need to include copies of default musics. The only option we will look at here during the beginner tutorial is the "Edit Music Rotation" button. When you click this, a second window pops up, which allows you to configure the order in which music plays throughout your levels. The Music Rotation dialog has one large textbox. Each line corresponds to one track in the rotation - so the first line is the track that will be played on the first level, the second line is the track that will be played on the second level, and so on. When the end of the list is reached, it starts again from the beginning. By default, it will list all the musics from Original Lemmings and Oh No! More Lemmings!. You can reset to this default by clicking the "Reset Music Rotation" button. The "default" musics are considered to be all those from Original Lemmings and Oh No! More Lemmings!. The names for the Original Lemmings tracks are orig_01 through to orig_17, while the names for the Oh No! More Lemmings! tracks are ohno_01 through to ohno_06. Note that the Original Lemmings tracks follow the Amiga ordering, not the DOS ordering. The last tab, the "Other Data" tab, contains... well, everything else. 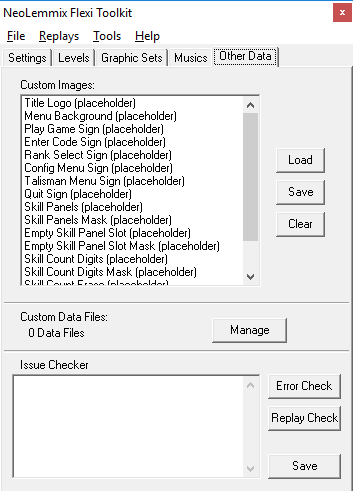 Everything on this tab is completely optional. We will not be covering it in any great detail in the beginner tutorial, but here's a brief overview. This is for other data files - first is custom graphics, which will be covered in the Intermediate tutorial. The next is custom data files, which is used to include any file in the NXP that the Flexi Toolkit does not provide a direct way to handle; this will be used in both the Intermediate and Advanced tutorials. The final option is the "Issue Checker". By clicking "Error Check", the Flexi Toolkit will check if there's any potential issues with your pack, and inform you of what they are - this could be missing graphic sets, out-of-date-format levels, or so on. If all is clear, it will say "No Issues Found". You can click the "Save" button to save the issue report to a text file. We will not cover "Replay Check" in the basic tutorial. So, we've seen how to actually set the pack's data, but what about actually saving it? As you probably guessed - File -> Save is where you want to look. You'll be asked where you want to save the SYSTEM.DAT file; but this is actually saving the whole pack - other files will be saved to the same folder that the SYSTEM.DAT file is saved to. This can be a tad slow, and may seem like the tool has crashed - don't worry, just wait a bit for it to do its thing. Note that when saving, the tool will clear out most files in the target folder - all .DAT files, as well as any files that match potential names of data files, even if they aren't used in your pack. This is why your project should have a dedicated directory. It is okay to have subfolders within this directory, as long as you do not name them "levels", "replay" or "files", but you should avoid storing any files other than those placed by the toolkit (except the NXP and its associated save file) in the project folder itself. Once we've saved our pack, how about building an NXP for it? That's simple - first save your pack, then go to File -> Build NXP. You will be asked to pick a filename for your NXP file. Note that it must be saved into your project folder; however it is fine to move it afterwards. When distributing your NXP, you do not need to distribute any of your other project files - only the NXP itself needs to be distributed. Well done! You've just built your own Flexi-based NeoLemmix pack! :) If you're ready to move on to some more in-depth customizing, then it's time for the Intermediate Tutorial. |